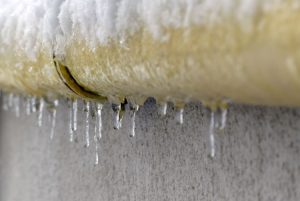
Seattle winters are mild compared to much of the country, but that mildness is exactly what makes them dangerous for your plumbing. Because hard freezes are relatively rare here, many Seattle homes lack the freeze protection found in colder climates. When temperatures do drop below freezing, as they reliably do several times each winter, unprepared homes are vulnerable to burst pipes, frozen fixtures, and costly water damage.
At Bee’s Plumbing & Heating, we see a surge in emergency calls every time Seattle experiences a cold snap. The vast majority of these calls are for problems that could have been prevented with some basic preparation. This guide walks you through everything you need to do to protect your home’s plumbing before winter arrives.
Why Seattle Homes Are Particularly Vulnerable
Homes in consistently cold climates like Minnesota or Montana are built with freeze protection in mind. Pipes are run through heated interior spaces, foundations are deeply insulated, and homeowners know the drill for cold weather preparation.
Seattle homes are different. Many were built during eras when freeze protection wasn’t a significant design consideration. You’ll commonly find water supply pipes running through uninsulated crawl spaces, exterior walls without adequate insulation, and outdoor hose bibs without frost-free valves. Our typically mild winters mean these vulnerabilities go unnoticed for years, until a polar air mass pushes south from Canada and temperatures plummet into the teens or single digits.
The 2024 cold snap is a perfect example. Temperatures dropped into the low teens across the Puget Sound region, and plumbing companies across Seattle were overwhelmed with burst pipe calls. Homes that had taken even basic precautions fared dramatically better than those that hadn’t.
Start With an Inspection: Know Your Vulnerabilities
Effective winterization starts with knowing where your plumbing is most exposed. Before cold weather arrives, conduct a thorough inspection of your home’s plumbing.
Check Your Crawl Space
If your home has a crawl space, this is likely where your most vulnerable pipes are located. Grab a flashlight and inspect the space for exposed water supply pipes, particularly any that run near exterior vents or along the perimeter of the foundation.
Check the condition of existing pipe insulation. Foam sleeves deteriorate over time, especially in the damp environment of a Pacific Northwest crawl space. Compressed, cracked, or waterlogged insulation provides minimal protection and should be replaced.
Inspect crawl space vents. Many Seattle homes have operable crawl space vents that should be closed during cold weather to prevent frigid air from reaching pipes. Some homes have had vents permanently sealed, which is acceptable as long as moisture management is handled through other means, such as a vapor barrier and dehumidifier.
Identify Pipes in Exterior Walls
Pipes running through exterior walls are at elevated risk during freezes. Common locations include kitchen sink supply lines on exterior walls, bathroom plumbing on the outer walls of additions, and laundry connections on exterior walls in garages or utility rooms.
These pipes are harder to access and protect than crawl space pipes. If you know you have supply lines in exterior walls, the strategies in the next section are especially important for your home.
Locate Your Main Water Shutoff
Every household member should know where the main water shutoff valve is located and how to operate it. In Seattle homes, the shutoff is most commonly found in the basement or crawl space where the water main enters the house, in a utility closet near the water heater, or near the front of the house at ground level.
Test the valve now, before an emergency. Turn it fully closed and verify that water stops flowing at all fixtures, then reopen it. If the valve is corroded, seized, or difficult to operate, have it replaced before winter. In a pipe-burst emergency, a working shutoff valve can save your home from catastrophic water damage.
Insulate Exposed Pipes
Pipe insulation is the single most effective and affordable freeze prevention measure. Focus on water supply pipes in unheated spaces including crawl spaces, garages, attics, and unfinished basements.
Choosing the Right Insulation
Foam pipe sleeves are the most common choice for residential pipe insulation. They come in pre-slit tubes that simply snap over the pipe. For maximum protection, choose sleeves with a wall thickness of at least 3/4 inch. For pipes in particularly exposed locations, consider doubling up with two layers.
Fiberglass pipe wrap provides better insulation value per inch and is a good choice for pipes in extremely cold locations. Heat tape or heat cable, which uses a low-wattage electric element to keep pipes above freezing, is the ultimate protection for the most vulnerable pipe runs. Self-regulating heat cable is the safest option, as it adjusts its heat output based on temperature.
Installation Tips
Cover every inch of exposed pipe, including fittings and valves, which are often the first points to freeze. Seal all seams and joints in the insulation with foil tape to prevent cold air from reaching the pipe. Don’t forget to insulate the hot water pipes too. While they’re less likely to freeze, insulating them reduces heat loss and saves energy.
Protect Outdoor Plumbing
Outdoor plumbing fixtures are the most exposed and most commonly damaged during freezes.
Hose Bibs and Outdoor Faucets
Disconnect all garden hoses from outdoor faucets before the first freeze. This is the single most important outdoor plumbing step you can take. A connected hose prevents the hose bib from draining properly, trapping water that will freeze and expand, cracking the valve or the pipe behind the wall.
If your home has standard (non-frost-free) hose bibs, locate the interior shutoff valve for each one, typically found in the basement or crawl space. Close the shutoff and then open the outdoor faucet to drain any remaining water from the line.
For homes with frost-free hose bibs, disconnecting the hose is usually sufficient. These valves are designed so the actual shutoff point is inside the heated envelope of the house, allowing the exposed portion to drain. However, they only work correctly if the hose is disconnected.
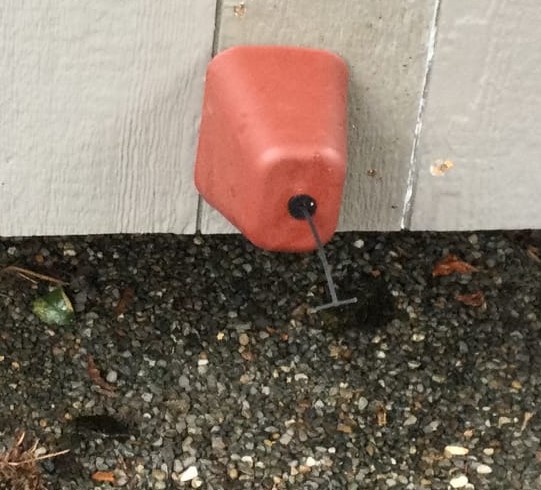
Consider installing insulated hose bib covers, available at any hardware store for a few dollars. These foam covers provide an extra layer of protection and are especially useful for hose bibs on north-facing walls.
Irrigation Systems
If you have an in-ground irrigation system, it must be properly winterized before freezing temperatures arrive. This involves shutting off the water supply to the system, blowing compressed air through the lines to clear all remaining water, and draining the backflow prevention device.
Professional irrigation winterization in Seattle typically costs $75 to $150 and is well worth the investment compared to the cost of replacing cracked pipes and sprinkler heads in the spring.
Prepare Your Water Heater
Your water heater works significantly harder during winter months. Incoming water temperature in Seattle drops from the mid-50s in summer to the low 40s in winter, meaning your water heater must work harder to reach the set temperature.
Insulate your water heater with an insulation blanket if it’s located in an unheated space like a garage. This is particularly important for older units with less built-in insulation. Modern water heaters typically have sufficient insulation, but units more than 10 years old can benefit from an additional blanket.
Verify that the temperature is set to 120 degrees Fahrenheit. This is the recommended setting that balances comfort, energy efficiency, and scalding prevention. During winter, some homeowners are tempted to increase the temperature, but this increases energy costs, accelerates sediment buildup, and creates a scalding risk.
If your water heater is more than 10 years old, winter is a poor time for it to fail. Consider proactive replacement before the cold season rather than risking a failure when plumber availability is limited and cold incoming water makes the situation more urgent.
What to Do During a Freeze
When freezing temperatures are forecast, take these active steps to protect your plumbing.
Keep your thermostat set to at least 55 degrees, even if you’re away from home. The cost of heating an empty house for a few days is negligible compared to the cost of repairing burst pipes and water damage.
Open cabinet doors under sinks on exterior walls to allow warm room air to reach the pipes. This is especially important in kitchens and bathrooms where supply lines run through exterior walls.
Let a thin stream of water trickle from the faucet farthest from where the main water line enters your home. Moving water is much harder to freeze than standing water. You don’t need a heavy flow, just a pencil-thin stream from both hot and cold lines.
If you have a crawl space, close all vents and consider placing a small space heater in the crawl space during extreme cold. Use a heater with an automatic shutoff and keep it away from any flammable materials.
What to Do If Pipes Freeze
If you turn on a faucet and nothing comes out, or only a trickle flows, you likely have a frozen pipe. Here’s what to do and what not to do.
Keep the affected faucet open. As the ice begins to melt, water needs somewhere to go, and an open faucet relieves the pressure that causes pipes to burst.
Apply gentle heat to the suspected frozen section using a hair dryer, a heating pad wrapped around the pipe, or towels soaked in hot water. Work from the faucet end back toward the frozen section.
Never use an open flame, propane torch, or heat gun to thaw frozen pipes. These can damage the pipe, ignite nearby materials, or cause the water inside to boil and create a dangerous steam explosion.
If you can’t locate the frozen section, if multiple pipes are frozen, or if you suspect a pipe has already burst, call a licensed plumber immediately. At Bee’s Plumbing & Heating, we offer emergency plumbing service and can respond quickly to minimize damage.
Long-Term Freeze Prevention Upgrades
If your home is particularly vulnerable to freezing, consider these longer-term improvements. Replacing standard hose bibs with frost-free models eliminates the most common source of freeze damage. Adding insulation to crawl spaces and exterior walls protects pipes and improves overall energy efficiency. Rerouting exposed pipes from exterior walls to interior spaces permanently eliminates the freeze risk. And installing a whole-house water leak detection system provides early warning of any leak, giving you time to shut off water before major damage occurs.
Schedule Your Winter Plumbing Checkup
The best time to prepare your plumbing for winter is before the first freeze, ideally in September or October. At Bee’s Plumbing & Heating, we offer winter preparation services that include a thorough inspection of your plumbing system’s cold-weather vulnerabilities, insulation of exposed pipes, testing and servicing of water heaters, and hose bib inspection and winterization.
Don’t wait for the first cold snap. Contact Bee’s Plumbing & Heating today to schedule your winter plumbing preparation and protect your Seattle home from freeze damage this season.
Need Professional Plumbing or Heating Help?
Our expert technicians are ready to assist you with any plumbing, heating, or drain needs.